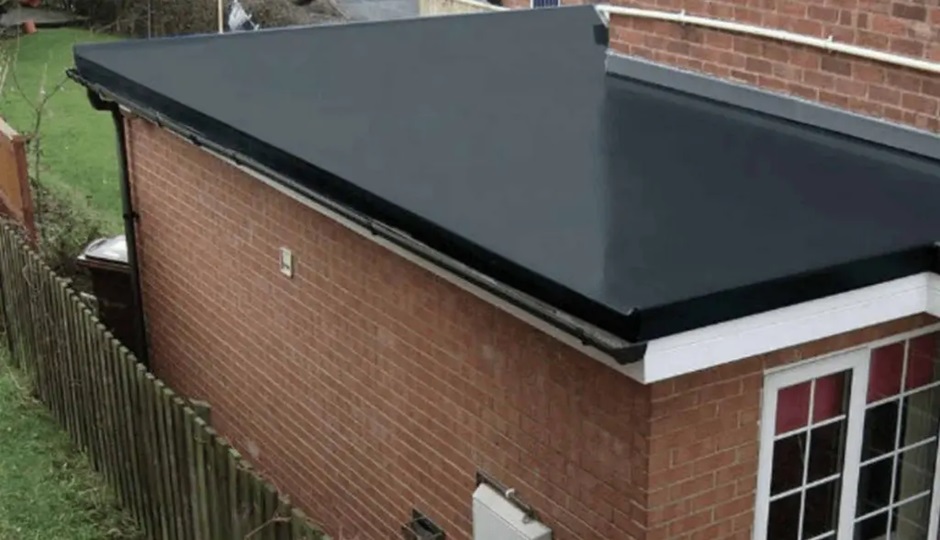
Flat rubber roofing, also known as EPDM (ethylene propylene diene terpolymer) roofing, is a popular choice for both residential and commercial buildings. Its durability, flexibility, and ease of maintenance make it an ideal option for flat or low-slope roofs. This guide provides a comprehensive overview of flat rubber roofing installation and roofing repair, helping you understand the process, benefits, and maintenance requirements.
Understanding Flat Rubber Roofing
EPDM rubber roofing is made from a blend of synthetic rubber, designed to withstand harsh weather conditions, UV rays, and temperature fluctuations. Its longevity and resistance to wear and tear make it a preferred choice for flat roofing systems. The material comes in large sheets that can cover wide areas with minimal seams, reducing the risk of leaks.
Benefits of Flat Rubber Roofing
Durability
EPDM roofing is known for its long lifespan, often exceeding 30 years with proper maintenance. Its resistance to extreme temperatures, ozone, and UV radiation contributes to its longevity.
Flexibility
The flexibility of EPDM makes it easy to install on various roof shapes and sizes. It can stretch and conform to the roof’s contours, ensuring a tight and secure fit.
Cost-Effectiveness
Compared to other roofing materials, flat rubber roofing is relatively inexpensive. The installation process is straightforward, reducing labor costs.
Environmentally Friendly
EPDM is recyclable and energy-efficient, reflecting heat and reducing cooling costs in warmer climates.
Flat Rubber Roofing Installation
Installing flat rubber roofing involves several steps, from preparation to finishing touches. Here’s a detailed look at the process:
1. Preparation
Before starting the installation, it’s crucial to inspect the roof deck for any damage or debris. Ensure that the surface is clean, dry, and smooth. Any existing roofing material should be removed, and the deck should be repaired if necessary.
2. Measuring and Cutting
Measure the roof’s dimensions accurately to determine the amount of EPDM needed. Cut the rubber sheets to fit the roof’s size, leaving a few inches of excess material around the edges.
3. Applying Adhesive
Apply a suitable adhesive to the roof deck using a roller or brush. It’s important to follow the manufacturer’s instructions regarding the adhesive type and application method. Allow the adhesive to become tacky before proceeding.
4. Laying the Rubber Sheets
Carefully lay the rubber sheets over the adhesive, starting from one end and working your way to the other. Smooth out any wrinkles or air bubbles using a broom or roller. Ensure that the sheets are aligned correctly and overlap slightly at the seams.
5. Seaming
Use seam tape or adhesive to seal the seams between the rubber sheets. This step is critical to prevent water infiltration. Apply pressure to the seams to ensure a strong bond.
6. Finishing
Trim the excess rubber around the edges and install flashing to secure the edges and prevent water from seeping under the roofing material. Inspect the entire roof to ensure that all seams and edges are properly sealed.
Roofing Repair
Despite its durability, flat rubber roofing may require repairs over time due to punctures, tears, or seam separation. Here are common roofing repair techniques:
Patching
Small punctures or tears can be repaired using a rubber patch. Clean the damaged area thoroughly and apply a primer. Cut a patch from the EPDM material and apply it over the damaged spot using adhesive. Press down firmly to ensure a secure bond.
Seam Repair
If the seams between the rubber sheets start to separate, clean the affected area and apply seam tape or adhesive to reseal the seam. Ensure that the seam is fully bonded to prevent leaks.
Flashing Repair
Flashing around roof edges, vents, and chimneys can deteriorate over time. Inspect the flashing regularly and replace it if necessary. Use EPDM-compatible flashing to ensure a proper seal.
Regular Maintenance
Regular maintenance is essential to prolong the life of your flat rubber roof. Inspect the roof at least twice a year and after severe weather events. Remove any debris, clean the surface, and address any minor issues promptly to prevent major problems.
Conclusion
Flat rubber roofing installation and roofing repair are manageable tasks with the right knowledge and tools. EPDM roofing offers numerous benefits, including durability, flexibility, and cost-effectiveness, making it an excellent choice for flat or low-slope roofs. By following the proper installation techniques and performing regular maintenance, you can ensure the longevity and performance of your rubber roof.
Whether you’re considering a new roof installation or need to address repairs, understanding the process and best practices for flat rubber roofing will help you make informed decisions and maintain a secure, weather-resistant roof for years to come.


